
How to Examine Bindings
By Werner Rebsamen
You just received several cartons full of bound books. How do you know if these books are usable and of the quality you expect them to be? Just as you would with other purchased items, you need to examine every bound item. Shortcomings are often hidden, and invisible to a lay person, who may become aware of a problem too late. Some quality issues may be aesthetic; some may be structural; and still others may be related to the paper itself - the paper-grain, coatings, poor workmanship or outright fraud. How does one recognize such problems? It comes down to knowledge and awareness. We need to know what we have purchased and what has been delivered. The best client anyone can have is one who is educated about the product. This is true when buying a car, clothing, furniture or other household items, or as in this case, bound books.
The Library Binding Manual, published in 1972, addresses the topic of examining bindings on pages 59 to 62. Many of our younger readers may not be aware of the availability of this earlier LBI publication. Some of the material is outdated, evidenced by the fact that it is written to examine only oversewn, Class "A" library bindings, a term that is no longer being used. While time and technology have changed our industry, some of what is in this manual is still valid. The examination of bindings could easily cover a 100 or more page book; this article will focus on common problem areas without the expansive detail of a manual.
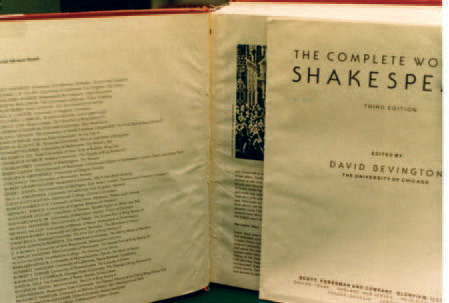
Text-blocks, also referred to as book blocks, come in all sizes and shapes. The format may be upright or oblong and the dimensions will vary-some are large or extremely small, others are square or die-cut to a specific theme. Some are very thick, like my heavy, unabridged Webster Dictionary, which has a bulk of 4 1/2 inches! Others are so thin we cannot call them text blocks anymore. For those items, pamphlet or brochure are more appropriate terms. Then there is the paper itself. Some of the papers used with 360 pages per inch (PPI) are just right in their feel and thickness; others, like the ones used on Bibles are often extremely thin. (PPI refers to the number of pages required to measure one inch. 1600 PPI means 1600 pages, or 800 sheets.) Then there are high bulk papers, made "fluffy" so that a few pages look like a thicker text block. (A publisher's trick - a few poems in a hardcover binding sell for much more money than a thin, saddle-stitched booklet.) Children's board books are a separate category.
To examine text blocks, fan them from front to back and back to front. Do some of the sheets stick together? On coated paper stocks, sticking together may be caused by exposure to moisture, coatings, heavy layers of ink, or trimming the edges with a dull knife. If the edges are gilded, bleeding images where the ink printed flush to the edges may stick together. This problem is caused by the heat generated off the sanding belts. Check print quality. If there are blank pages, two sheets may have stuck together when going through a sheet-fed press. Other printing- related items include off-set images, images being transferred to another page, image alignment, and opacity.
Wavy Paper may be the result of a text block having the grain direction perpendicular to the binding edge. It could also be dryness, especially evident on digital printed text. If we have a text block printed with the paper grain direction perpendicular to the binding edge, waviness on the fore edge is a common result. A paper fiber will swell or shrink four to five times more in its thickness than in its length. All machine-made paper has a distinct grain direction. In our ever-changing environments, especially those with higher humidity, paper fibers will be affected. As they swell and are unable to expand on the adhesive bound edge, they expand in the remaining areas. The unfortunate results are waviness, buckling and in the worst cases, the binding acts like a mousetrap that will not stay open. This is more common with stiff papers.
Dryness caused by the digital print process will cause waviness in either direction. Special papers and moisturizers used in the printing process have reduced, but not eliminated these problems. If a text block arrives with the paper being wavy, there is unfortunately nothing you can do to correct it. The damage is permanent.

A poor shipment of bindings. Note loose covers, flat-back bindings not being square, trim-marks on edge, and covers which do not fit.
Examining Text Block Bindings
Examining Soft Cover Bindings
Check for smoothly trimmed edges. Are there wrinkles on the spine? Are tear-outs on the top and bottom present? Does the cover adhere 100 percent to the spine? When you open the cover, is there a glue- line showing? If a cover is scored approximately 1/4 inch inwards from the bind-edge, is the side-gluing, to secure the cover panels, neat and clean? Is the binding square?
Examining Hardcover Bindings
A publisher's binding. Note the cross-grain paper resulting in buckling. The inner part of the folded signature coming loose on a quality sewn-through-the-fold binding = no lock stitch.
With many different styles of hard cover bindings, the examination process is complex. There are great differences between a thin, side-sewn, square-back hard cover structure and a bulky, rounded and backed binding. Simplify the task by starting with the text block. Whether they are adhesive bound or sewn, the text blocks must be trimmed on three sides.
Examine the text-block. Are the edges free of smudges, nicks and knife marks? Keep in mind that there are times when publishers try to imitate a rough "deckle-edge" on the fore-edge. I have had people come to me with such bindings saying that there must be a mistake! Creating such an unusual edge, an imitation of hand made paper, not only costs more, but requires a painstaking process to achieve such an effect. Are there any splits in the binding? This often occurs if coated and uncoated papers are mixed together. On certain digital presses, silicon fusion particles may cause shifting and splits in the text blocks, especially if they are mixed with other paper stocks. If a book is being rebound, is all the text still present or did the binder trim-off some of the text or images? Check if the text-blocks are square. If rounded and backed, is the round uniform and even? Is the backing uniform too large or too small? On a properly backed text-block, the shoulders should equal the thickness of the text block plus the thickness of the boards. There are exceptions, like on adhesive bindings where we sometimes create a so-called "pin- head." This is a deliberate, smaller shoulder as not to split the relative fragile adhesive binding forcing to stretch and bend. If a text block has headbands and reinforcing materials on the spine, do they adhere well?
Book covers. There are many different kinds of book cover materials. If the covering material is laminated, are the covers free of scratches and bubbles? If the covering materials are made from cloth or paper substrates, natural, coated or finished in many different ways, they should be clean of smudges, glue, nicks or bubbles. Is the covering material turned-in nice and evenly? Are the boards the right thickness, or do they feel too light or too heavy for a particular format? Are the corners shaped in a professional manner? Are the covers warped?
Casing-in. Casing-in is the multi-step process to combine the text block with the cover. In examining it, you will look at the application of water-based adhesive onto the end sheets, the cover dimension in regard to the trimmed text block, the edges, joints, pressing and overall fit. First, open a book in the front and back. If the pages adhere to each other, the binder used excess glue. Carefully separate those sheets from each other with a bone folder or a dull knife; do not use your fingers as the sheets will tear! Using your left and right hands hold the cover panels and let the text block dangle down. Now check joint adhesion. If the text block is loose in the hinges, return the book as it will not last. With even minimal use, the cover will separate from the text block. Check end sheets for wrinkles, looseness and/ or bubbles. Are all edges square? They should be 1/8 to 3/16 inches on all three sides and uniform. Now press your finger onto the spine. Does the cover fit tight? There should be no looseness. Are the joints (grooves) straight and neat? Finally, if library bound, examine the lettering. Is it legible, properly centered and arranged as specified?
Opening a Book for the First Time

Example of a loose joint area - reject this binding!
During my industrial career, while working in the Bible binding business, we used to include instructions with the very expensive gilded and leather bound Bibles on how to open a bound volume for the first time. Lay a book flat on a table. Now start from the front and bend just a few sheets. With a tender, loving hand, sliding from top to bottom, press the sheets down in the bind fold. Now repeat that task until you reach the center. Now turn the book around and proceed with the same from the back. Now your binding is "broken-in" and most likely will last at least twice as long.
Industry Standards Assure a Certain Quality

Standards, like the ANSI/NISO/LBI for Library Binding if followed, assures quality. No wonder this person, knowledgeable with all the tasks of bookbinding, is smiling while inspecting the works of a certified library binder.
In disputes and in the courts, the defending party often makes reference to "the items in question are bound in accordance to industry standards." I will often whisper into the attorney's ear to ask them what industry standard they are referencing. Unfortunately, most of the binding tasks performed in commercial trade shops are not covered by any standards or specifications. There are only three known standards, one being virtually forgotten.
NASTA refers to National Standard for Text Book Administrators. These are strict standards for school textbooks and include paper, paper-grain, binding materials and binding methods.
ANSI/NISO/LBI Z39.78-2000 is an American National Standard for Library Binding and describes the technical specifications and materials used for bindings. That is for new, for pre-bound, and for the various tasks of rebinding books which are intended for use in libraries.
Durable Hardcover Binding for Books ANSI/ NISO Z39 was a project to establish specifications for the tasks of binding durable hardcover books. Our intent was to force minimum specifications onto publishers. Despite the work our committee put into this project in 1991, that standard is today virtually unknown. Publishers? bindings are now, most of the time, a matter of cost. How recently have you seen sewn and cloth bound books? There are, to the regret of many lovers of quality books, not too many anymore.
In conclusion, despite established industry standards and business ethics, there are always violators who will try to sell you a binding that is not what it should be. The very worst example ever must have been a library binding which was sold as "bound in accordance to the LBI standard." Upon a careful examination, the book sold as being oversewn, was everything but. The bindery in question did not even have an oversewing machine. Instead, they used a saw and cut slanted grooves into the spine. Cords were glued into those cuts. The type of a technique applied was a so-called saw- kerf binding used for oversized news papers! This is why a careful examination of what has been sold and what has been received is always important.
For more in-depth readings on library binding, refer to the ALA publication, Guide to the Library Binding Institute Standard for Library Binding. Written by Jan Merrill-Oldham and Paul Parisi, it provides a through overview of all aspects of quality library bindings.
Werner Rebsamen is Professor Emeritus at the Rochester Institute of Technology and the technical consultant to HBI and the Library Binding Institute. He can be reached at wtrebs@metrocast.net.